Connect Arctype to ClickHouse
Arctype has built-in support for ClickHouse, and the configuration is very simple. If ClickHouse is not shown as one of the database types you will have to update Arctype.
1. Gather your ClickHouse details
To connect Arctype to ClickHouse; you will need this information about your ClickHouse deployment:
- endpoint
- port number
- username
- password
2. Download Arctype
Arctype is available at https://arctype.com/
3. Add a database
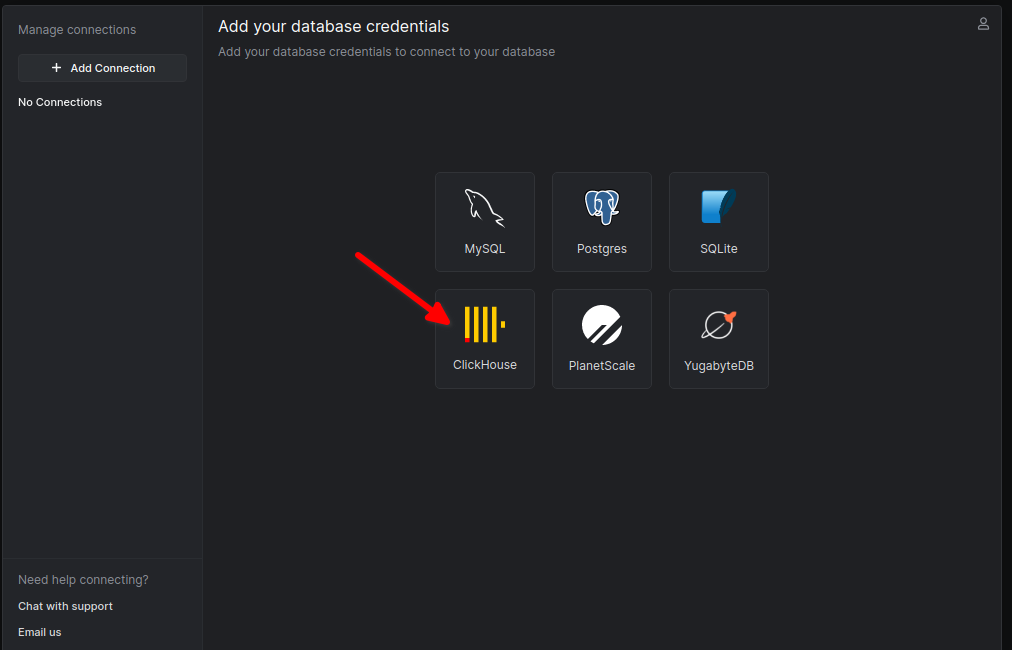
Start Arctype and click + Add Connection, and select ClickHouse:
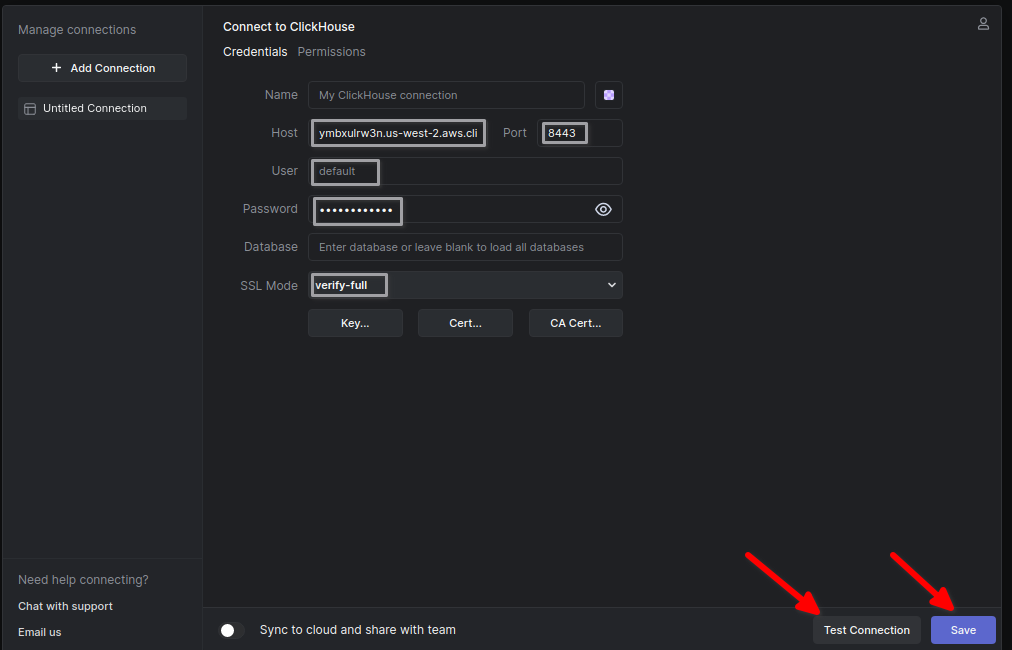
On the Credentials tab set the Host, Port, User, Password, and SSL Mode:
note
In this example the SSL Mode is set to verify-full. If you are not using SSL, or using a self-signed cert you may have to choose a different setting or upload your certificate(s).
- Test the connection and click Save.
4. Query ClickHouse
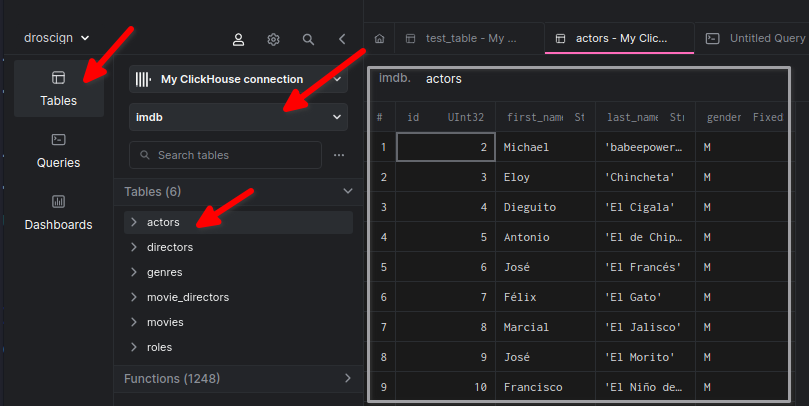
You can select databases and then tables by clicking on the Tables icon in the left navigation, and then selecting the database and table. You will see a tabular view of the selected table:
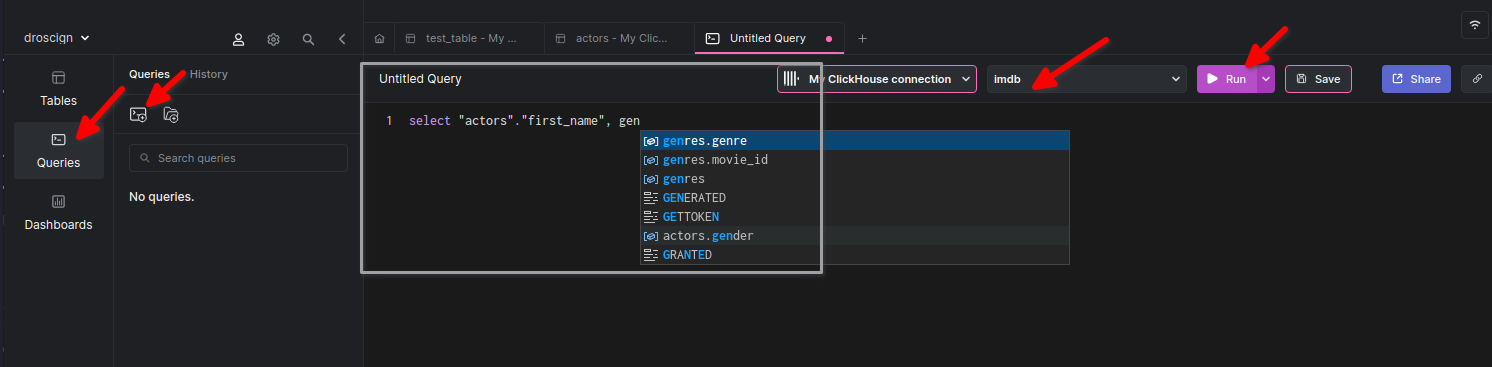
The next choice in the left navigation is Queries. After choosing Queries you can add a new query with the Add Query button, and then type your query in the query pane. As you type Arctype will provide you with table and column names:
Next Steps
See the Arctype documentation to learn about the capabilities of Arctype, and the ClickHouse documentation to learn about the capabilities of ClickHouse.